-
This article will guide you step by step through the process of purchasing a Web Hosting plan:.
Guide 3: Making a Hosting Purchase
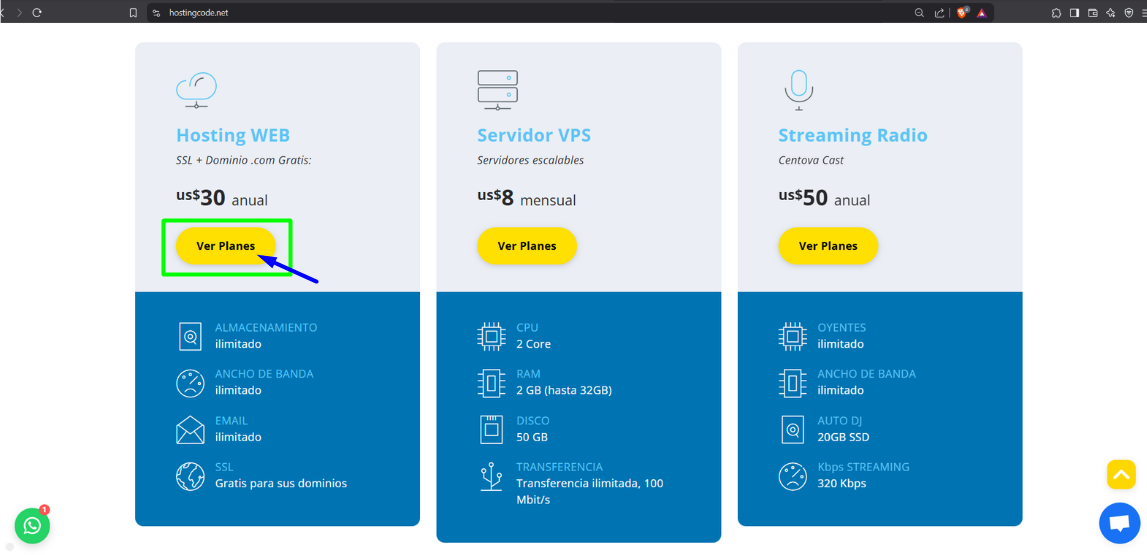
Step 1: Login to the website
- Login to hostingcode.net
- Browse the hosting plans and select “View Plans” in the Web Hosting plan column.
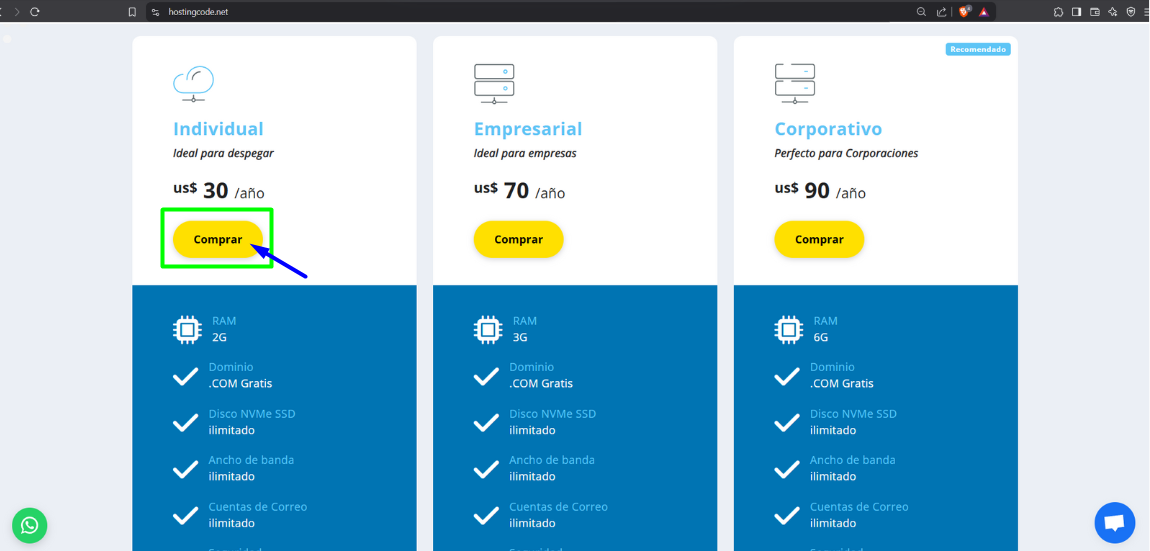
Step 2: Choose the hosting plan
- Select the “Buy” button on the desired plan.
Step 3: Select the domain name
There are three options: to proceed with the domain:
-
Register a new domain: Enter data and verify. Then, press the “Search” button and “Continue” or “Add to Cart”.

-
Transfer an existing domain: Requires 60 days, unlock and EPP code. Then, press the “Transfer” button and “Continue” or “Add to Cart”.

-
Use your own domain: Enter your domain and its extension, then press the “Use” button.

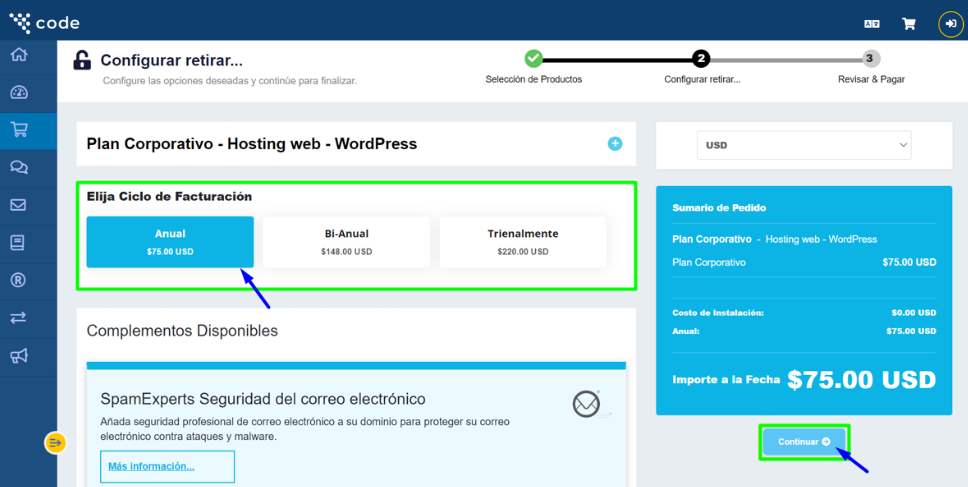
Step 4: Choose duration and add-ons
- If you used the 'Transfer Domain' option, enter the EPP or domain transfer code. Click the “Continue” button.
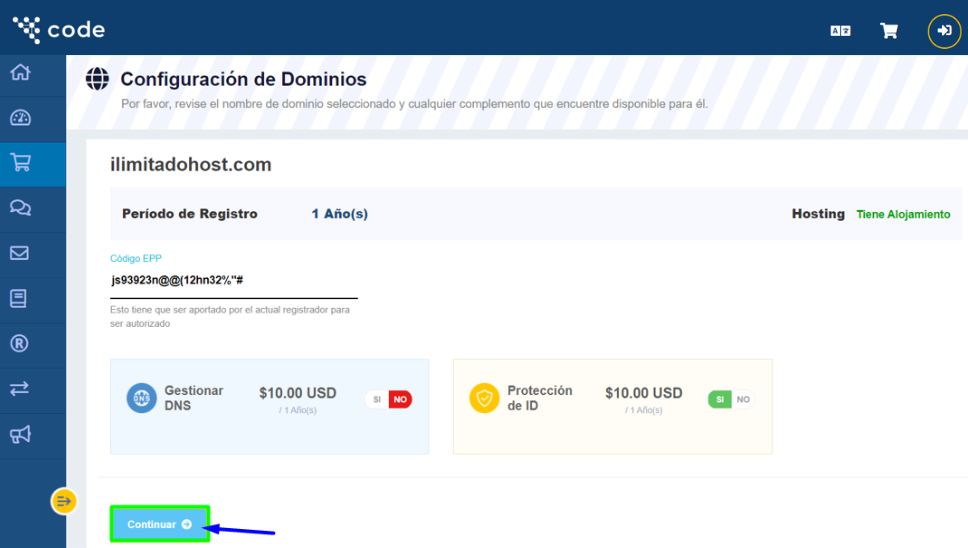
Step 5: Configure the domain
- Select billing cycle, you can also select additional add-ons. Click the “Continue” button.
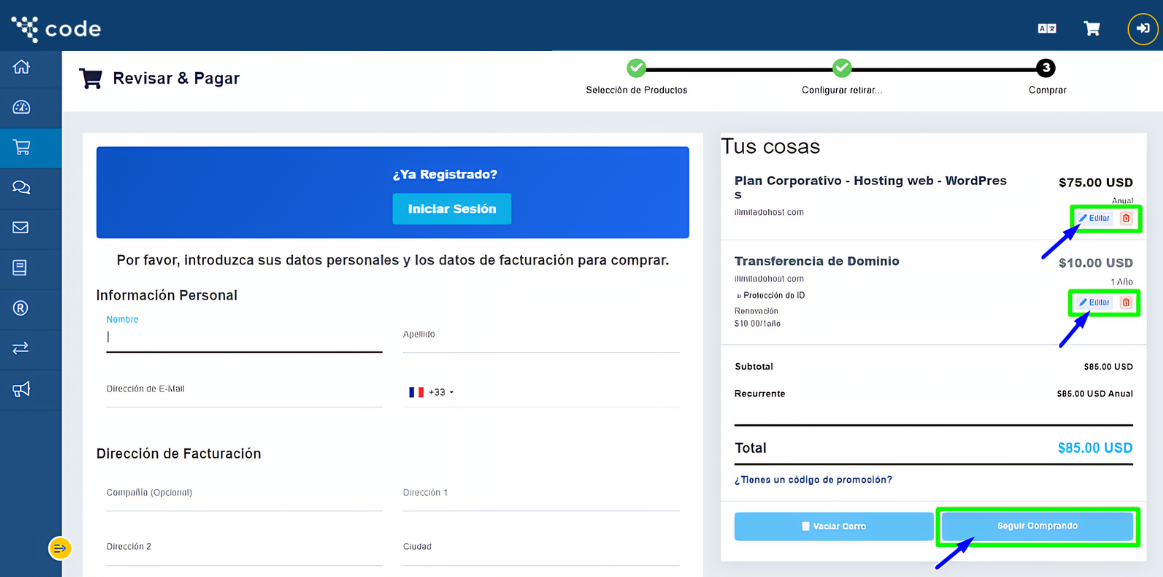
Step 6: Review the shopping cart
- Verify that the products are correctly added to the cart.
- Click the “Edit” button if you want to add more services or modify the order (do not remove the free domain included in the plan).
- Click the “Continue shopping” button.
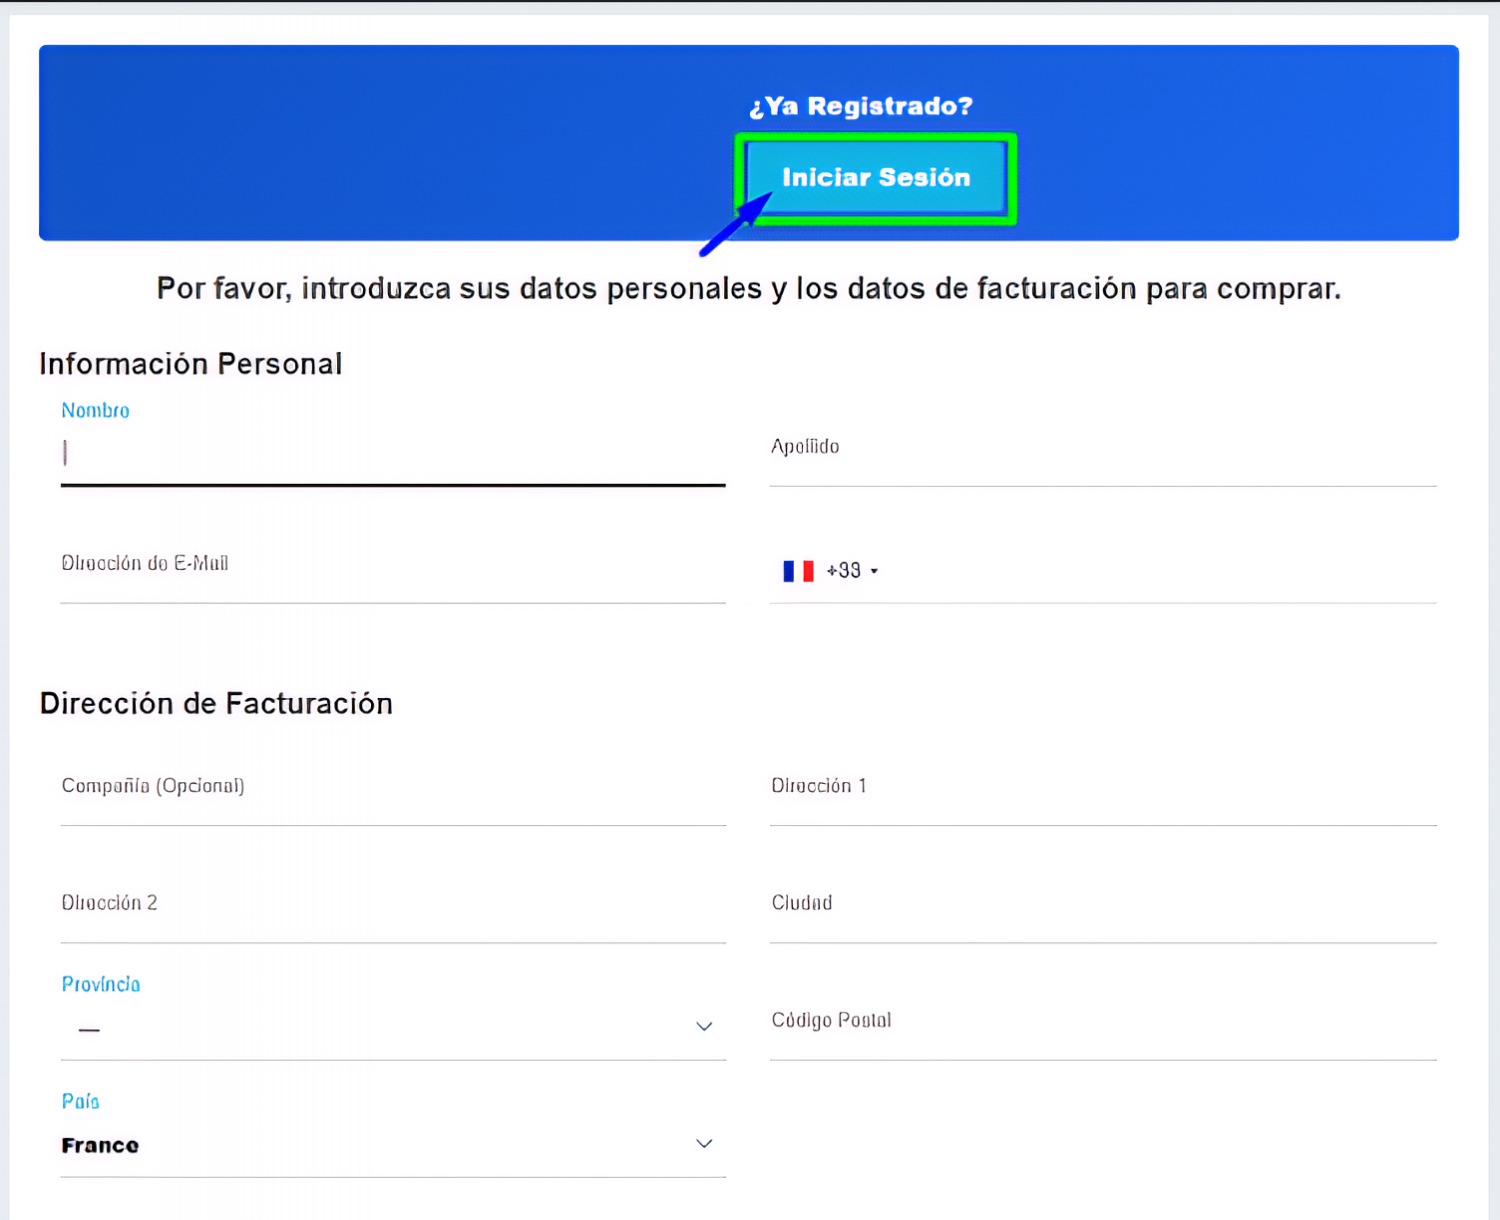
Step 7: Enter your data
- If you already have an account with us, click 'Login'; otherwise, enter your details in the form.
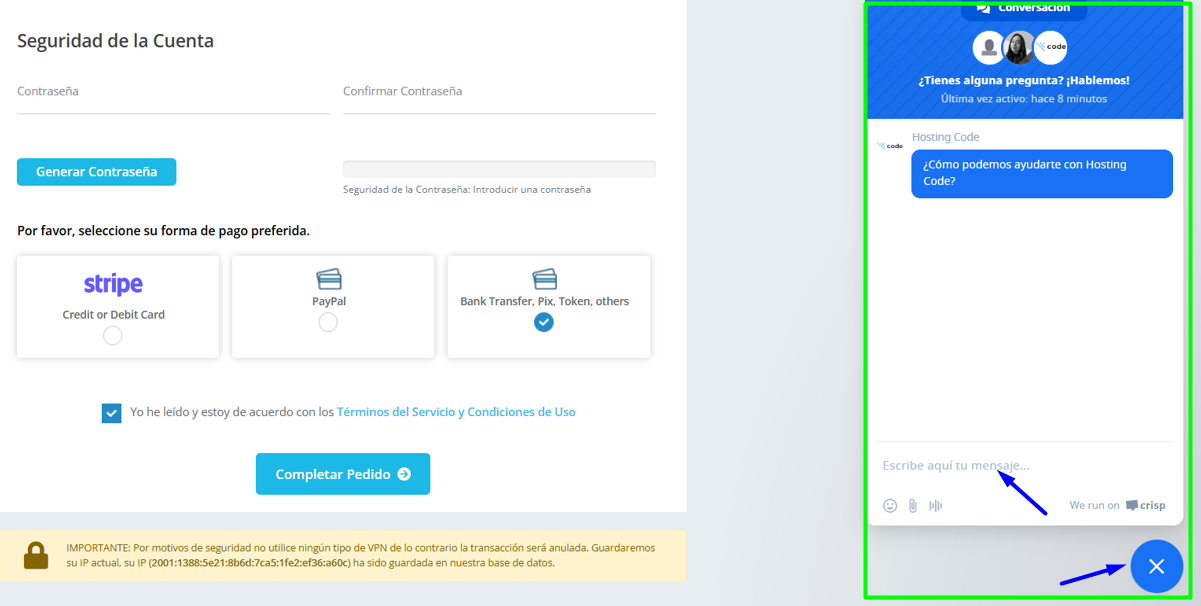
Step 8: Choose payment method
- Choose between the three available payment methods: STRIPE (card), PayPal or wire transfer.
-
STRIPE: Enter your card details and complete the payment.

-
PayPal: Enter your email address and complete the payment details.

-
Bank transfer: Contact an advisor by chat.

Step 9: Payment advice
- If you completed the payment with Stripe or PayPal, review the messages that were automatically sent to your email.
- In case you wish to pay by wire transfer, Pix, Token or others, please contact our chat support.