Guide 2: Buy HOST currency

Buy BNB

Did you know you can skip these steps?
Contact directly our customer service area to manage your BNB faster and without the need to buy the currency yourself.

✓ Express process
✓ Personalized advice
✓ No hassle

Step 1: Access the P2P section from the main platform

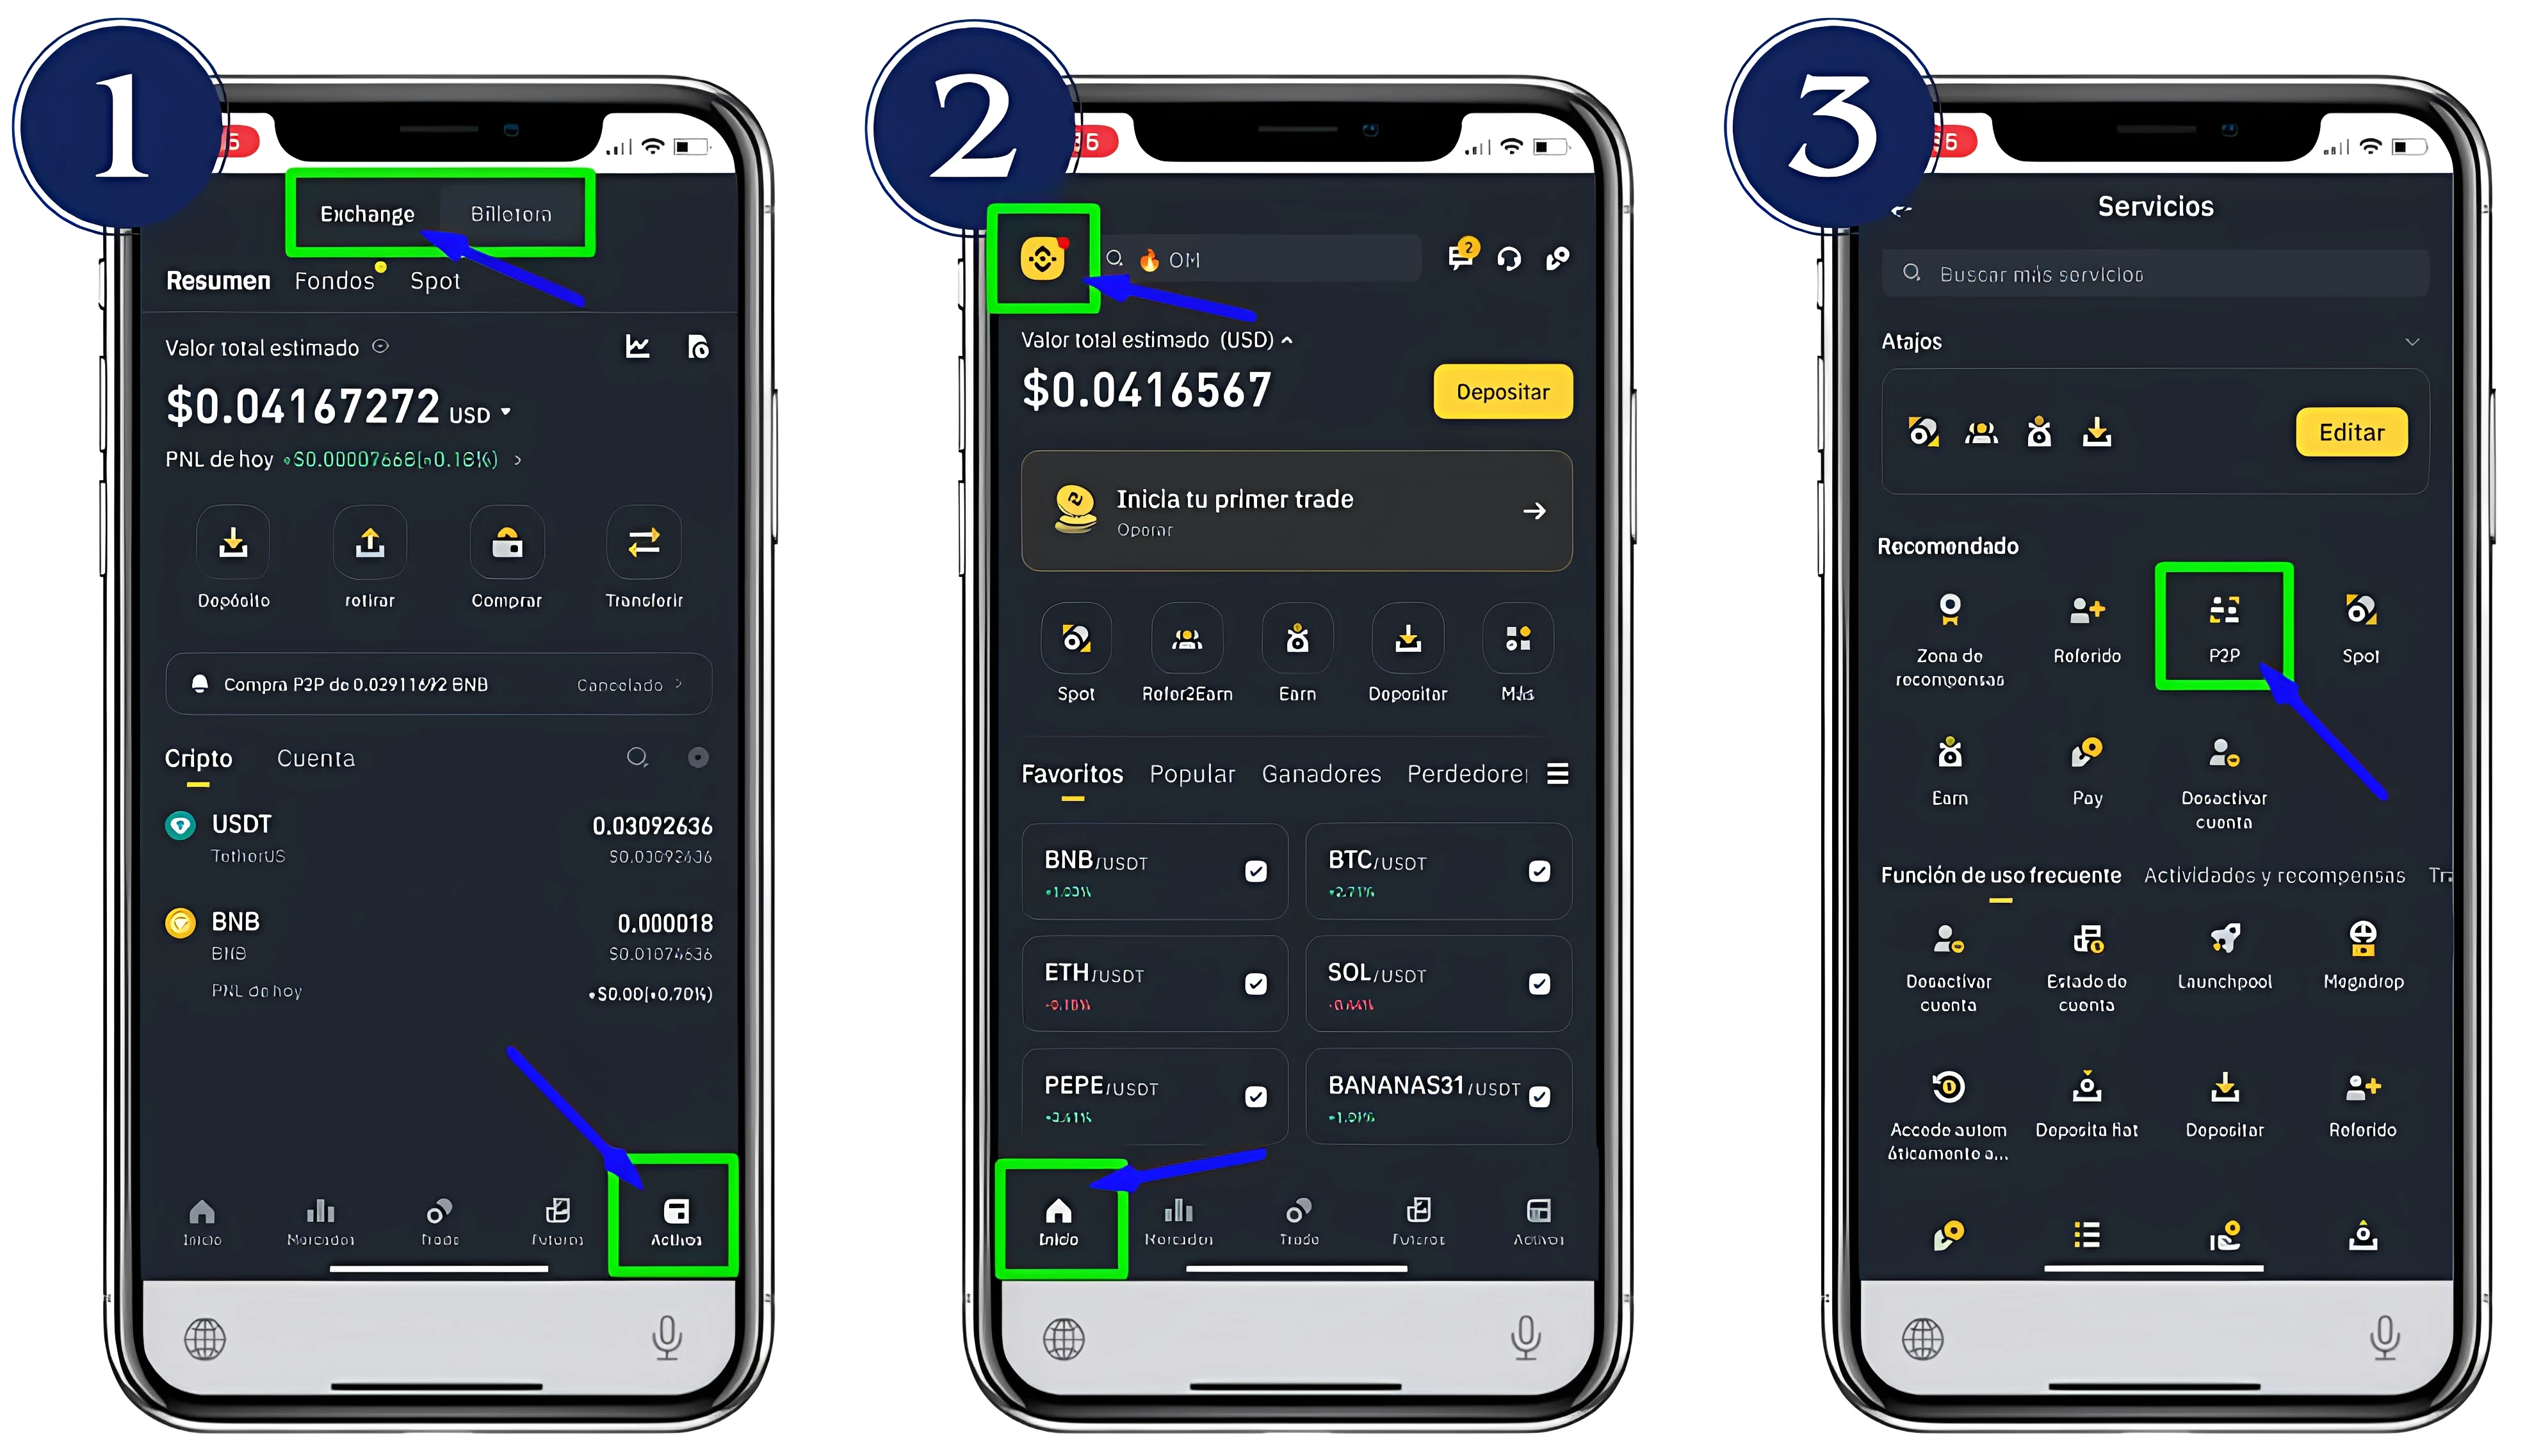
  1. Verify that you are in the "Exchange" section, at the bottom of "Assets".
  2. Go to the “Home” section and press the yellow icon located in the upper corner.
  3. Find and click on the “P2P” option.
  4. Paso 1

Step 2: Configure the currency

  1. Select the "P2P Trading" option.
  2. Select the “No, this is my first time in P2P” option.
  3. Choose the currency or currency available, according to your geographical location.
  4. Available currencies by country:

    Perú: PEN
    Bolivia: USD
    Ecuador: USD
    Chile: CLP
    Colombia: COP
    México: MXN
    Brasil: BRL
    Venezuela: VES
    ℹ️ Select the currency according to your location
    Paso 1
  5. In this case, for the guide, select USD (United States Dollar).
  6. Scroll down the options to select the BNB (Binance Coin) asset.
  7. Search for “BNB” and proceed to select the displayed option.
  8. Paso 1

Step 3: Confirm and verify the exchange

  1. Enter the amount and press "Select payment method".
  2. Choose the most convenient payment method according to your country and proceed to “Order Preview”
    Important note: Some payment methods may include additional fees (varies by country and payment type).
  • View the characteristics of the order, such as the amount to be paid, the total to be received in BNB and the payment method; then press “Enter order”.
  • Paso 2
  • Once inside the created order, press “Chat”.
  • Communicate directly with the BNB salesperson through the chat.
  • View all the features of the purchase and press "View payment details"
  • Paso 2

    Step 4: Make payment to the seller and confirm transaction

    1. Verify the payment details: amount to be transferred and payment method.
    2. Make the corresponding payment and return to the chat section to send the capture of the payment made.
    3. Select the option “Transferred, notify seller” once the payment process is completed.
    4. Paso 2
    5. Confirm that the transaction has been successfully completed with the message “Deposited to your funding account”.
    6. Paso 2

    Step 5: Receive BNB in the Wallet from Binance Exchange

    1. Go to the "Assets" section and select the "Receive" option.
    2. Wait for the available options to be enabled and select “Withdraw Binance Exchange”.
    3. Choose the token; in this case, select “BNB”.
    4. Paso 2
    5. Select the network “BNB Smart Chain (BEP20)” and press “Continue”.
    6. Display the message “Withdrawal in Process” and press “Go to Wallet”.
    7. View the amount received from the “Home” section of the wallet.
    8. Paso 2

    Swap BNB for HOST Token

    Step 1: Swap BNB for HOST

    1. Once you are in the "Wallet" section. Select the “Trade” option at the bottom
    2. Check the box and click “Accept legal notice”.
    3. Select the first box to choose, in this case, BNB.
    4. Paso 2
    5. Find and click on the “BNB” option.
    6. Go to the second box to be able to exchange for our token, which is HOST.
    7. Paste the token contract in the search bar; the HOST currency option will appear.
    8. Our HOST currency code: 0xc3F4...2320

      Copied!
      Paso 2

    Step 2: Approve and finalize the conversion

    1. Once both boxes are configured, select the "Approve BNB" option (if it appears with another name, press that option as well).
    2. Once both boxes have been configured, select the “Approve BNB” option (if it appears with another name, press that option as well).
      - Verify the conversion and press the “Continue” option.
    3. Wait with the message “Processing”.
    4. Paso 2
    5. Finally, visualize in the “Start” section that the exchange was successful.
    6. Paso 2